Editing the form
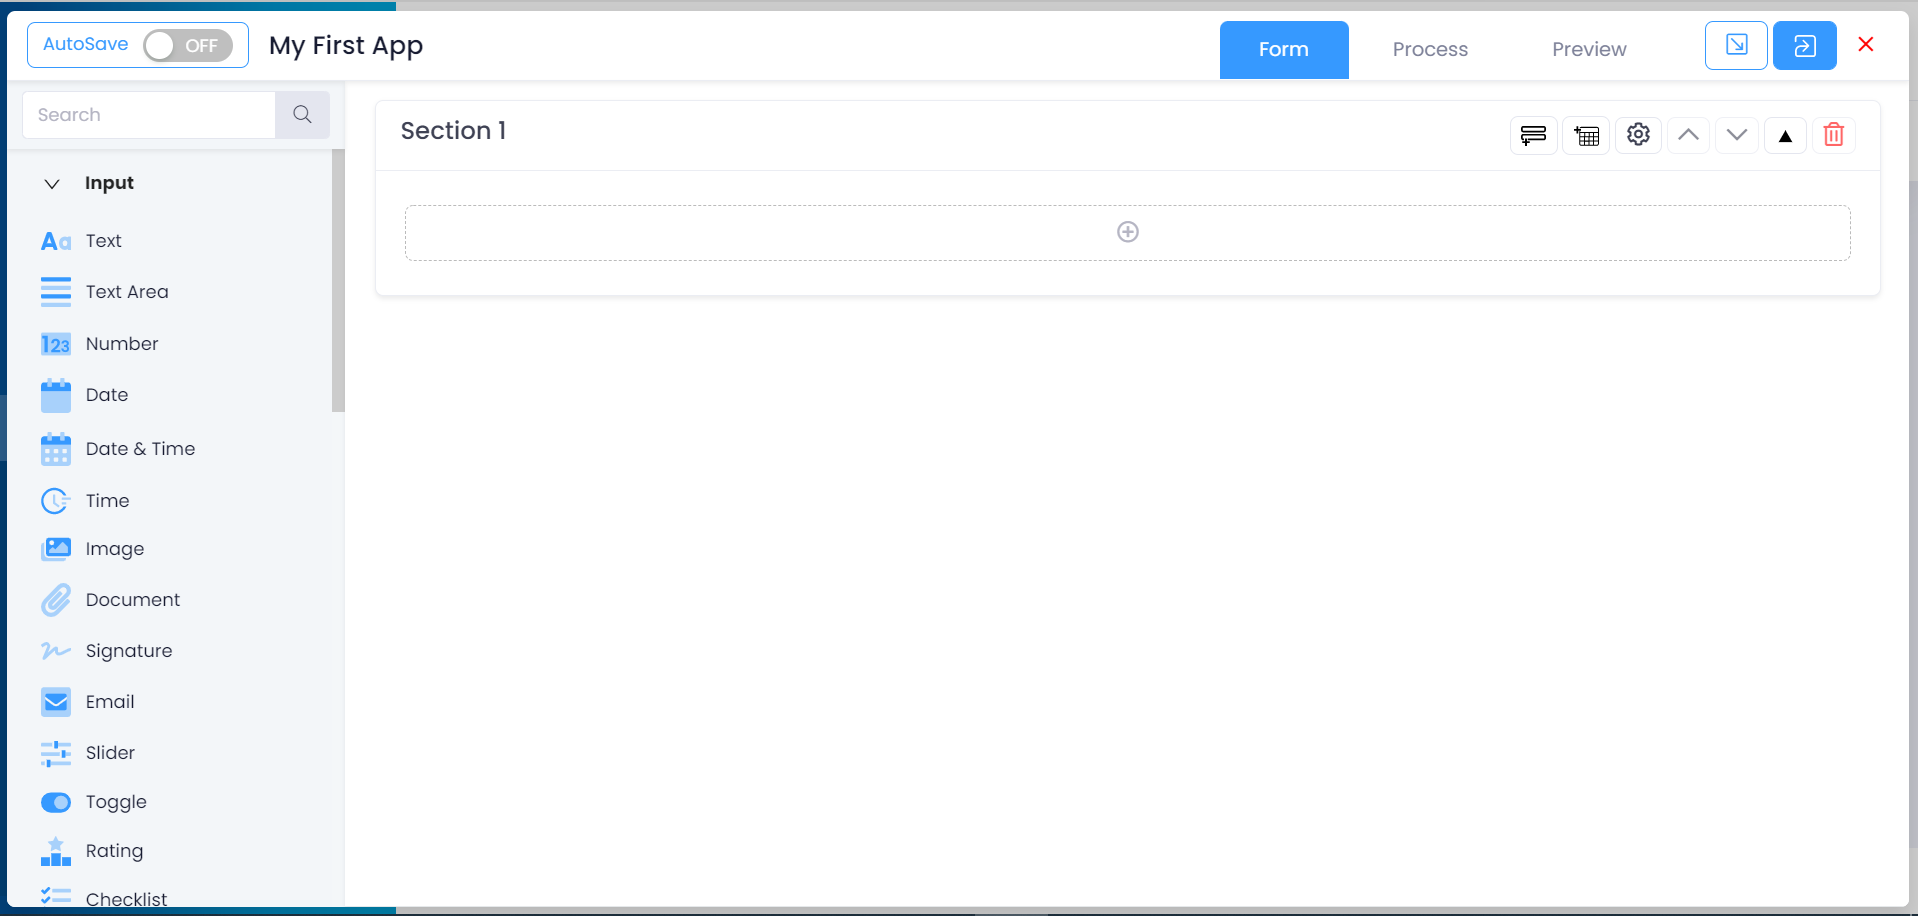
The first part of creating an app is to edit the form. You will be presented with a screen showing the available field types on the left and a blank form on the right.

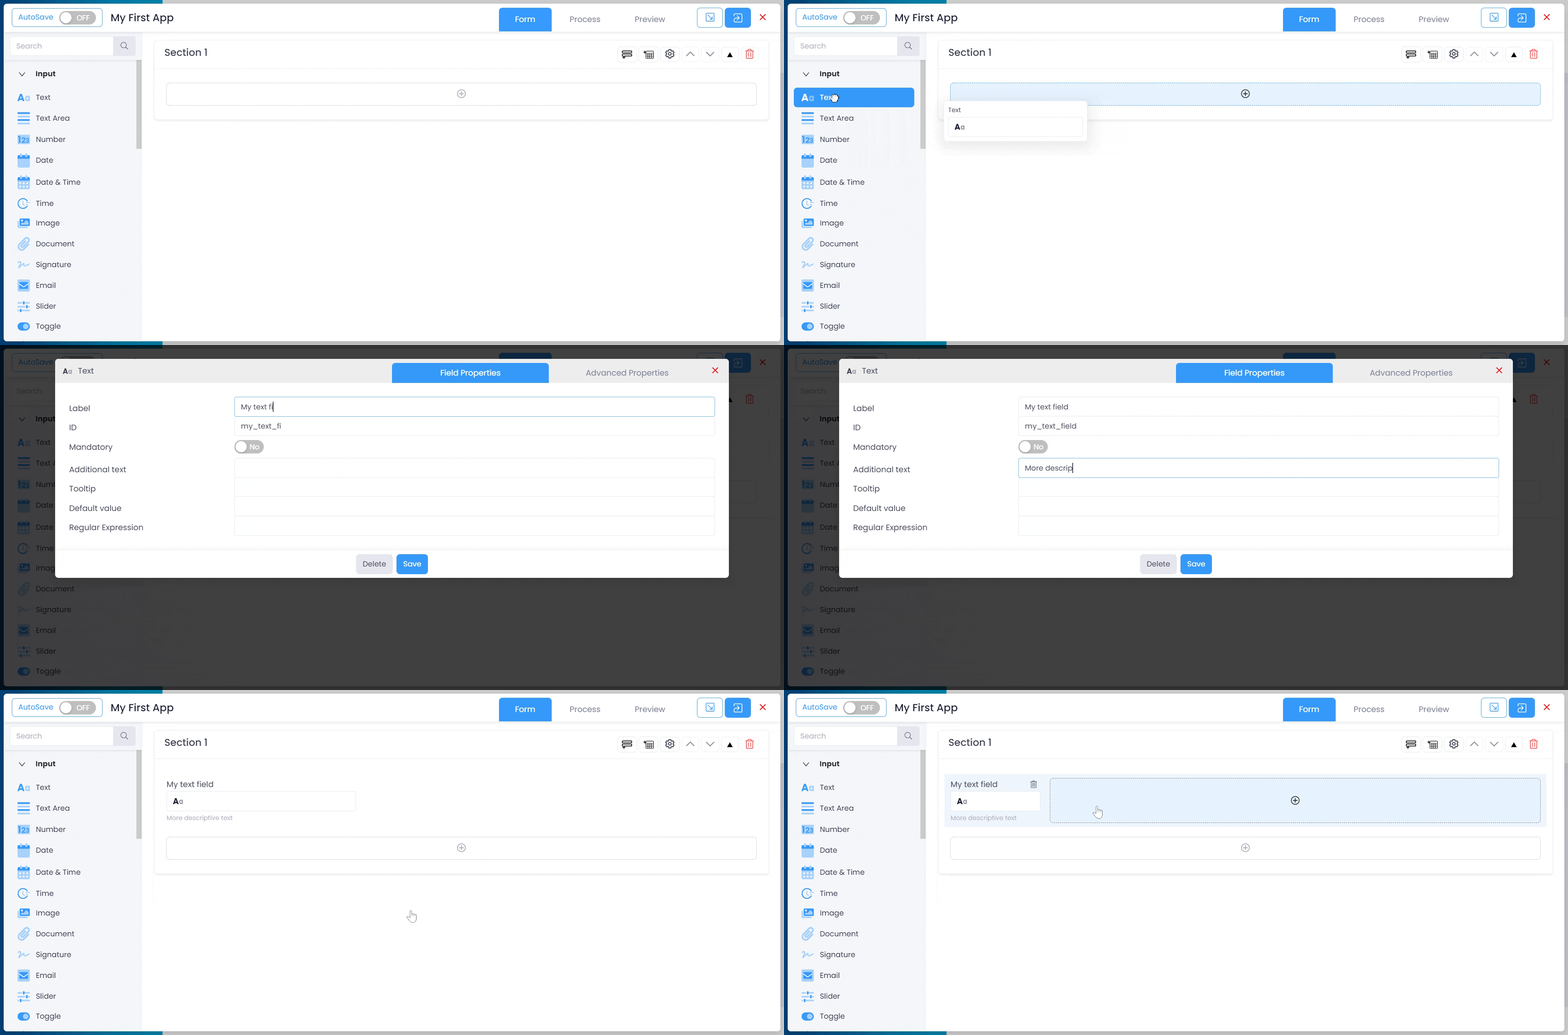
Field types are split in to categories which can be expanded and collapsed. To add a field simply drag it from the left side of the screen into any available area on the main form to the right. Available areas are those boxes with a '+' sign in them. When the field is dragged anywhere it can be dropped, the background will change colour. Fields can also be added by clicking the '+' button if preferred.
A pop-up box will appear where you can fill information about the field selected:

The information required will vary depending on the type of field, but the following will be common to most fields:
- Label - This is what the user will see on screen immediately above the field itself.
- ID - This is used to refer to the field in formulas and will default to the field label in lower case but with certain characters (such as spaces) replaced with underscores as these are not allowed. When the field is created this can be changed if required, however after that it is fixed and cannot be altered.
- Mandatory - This determines whether the user must complete the field. If set to 'Yes' the field will be marked with an asterisk on the form.
- Additional Text - Anything entered here appears below the field in smaller type and can be used to provide further details about what the user should enter here.
- Default Values - The value that will appear automatically when a new transaction is generated for this app. Leave this blank if a default is not required.
- Regular Expression - A regular expression is a way to validate data being entered into the field. These can be quite complex to construct, more details on this field are in the Advanced Properties section.
- Artificial Intelligence (AI) Service - If a 'Machine Learning Service' has been selected on the app details section then you can use this to specify the type of data this field should contain. This will help to ensure the correct data on the document being analysed is selected for this field.
Once saved the field will appear on the form.

Click on the field to bring the parameters pop-up back up. You can also drag it to a different position by clicking and holding down the mouse button, or resize it using the small circle 'drag' control on the right hand border of the field.

Be sure to save the form after you have made any changes by clicking the icon near the top right, or switch on 'Auto Save' at the top left if you want to have any changes saved as you go. The red 'X' at the far top right closes the form without saving.
You can see what the form will look like to users at any time by clicking on the 'Preview' tab. You can then click back to the 'Form' tab to continue editing.
You can delete fields by clicking on the delete button on the item properties editor or using the dustbin icon on the main form editor page.
Deleting fields from existing apps will also delete any data held in transaction already completed or in progress. Therefore on apps that have been in use for a while, use this with caution. Also be careful of deleting fields that might be referred to in formulas or process steps. If you want to keep the data, or are unsure if it can be deleted safely, you can use the visibility option in the advanced properties tab to make it invisible instead. Users won't see it in the app but data will still be retained for reporting purposes and dependent formulas will still work.
Form Sections and Tables
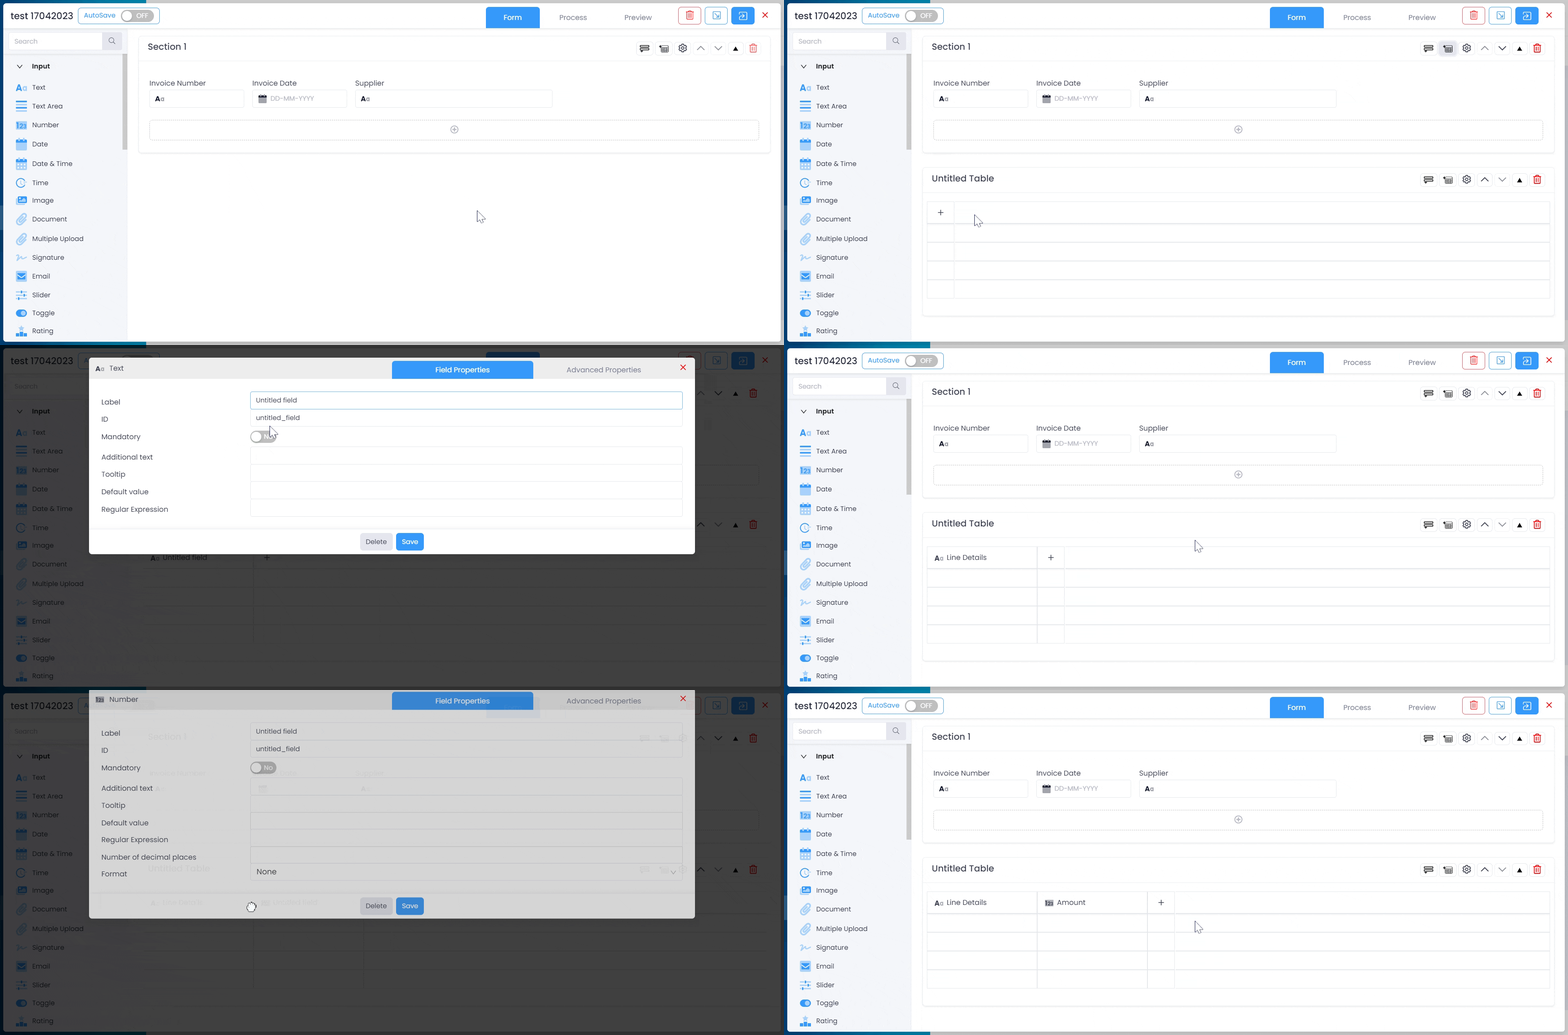
Forms can be split into multiple sections, these can be added to or edited from the options at the top of each section. From here you can also add a table, which would allow a user to enter multiple lines of data under the same columns headings, for example multiple lines of an invoice. Fields can be dragged on to the table in the same way as the main form, or added by the '+' button that appears when the table is created.

An app can have more than one table. However OCR will only work on the first table created, so if you are intending to use machine learning OCR make sure you create the relevant table first.